
A spear is the most vital weapon to have for many activities, such as going to war, hunting, but most importantly, getting that last ripe fruit from the top of the tree. You can make one just like this with a railroad spike.
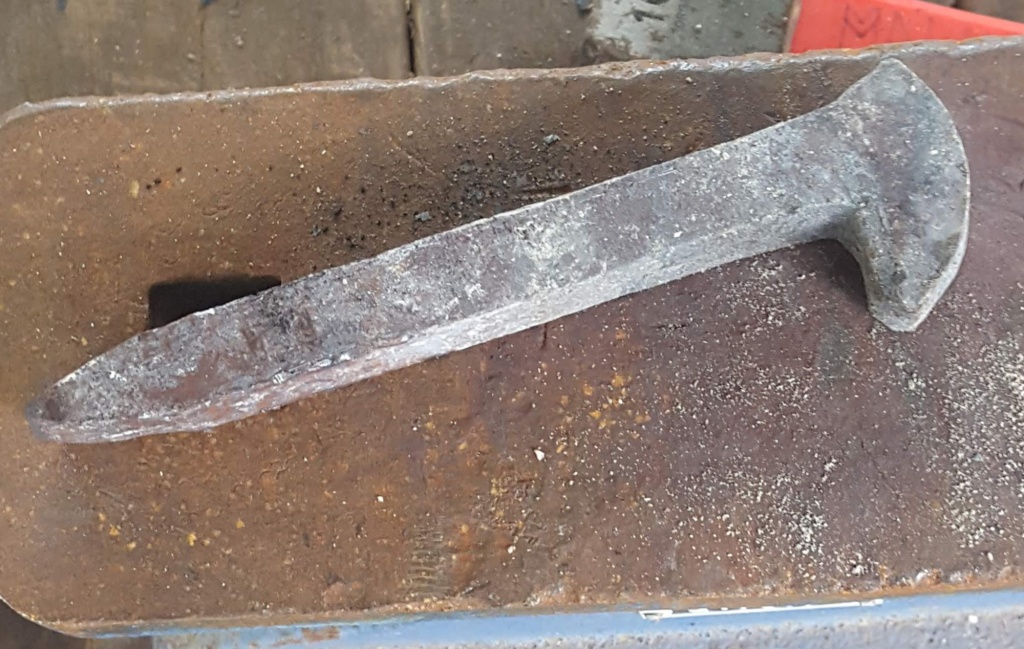
The picture above shows a railroad spike. Just to be clear however, this is not a good way to start your spear socket, as the one depicted was made into an axe. I found rolling it round before flaring out the socket provided the best result. In the future I will make another spear out of a spike. I will have Alex(that is my wife for those of you who might not know) take more pictures of the process. Looking below you see a rather cut off image of a tool stuck in the anvil. This is a bickern. I made this one out of a piece of 1″ round bar, which I believe is of some good quality. It was given as scrap, but the amount of pounding it has withstood without a significant alteration in form has rendered it a good tool. I suppose we should do a post about bickerns, or general tool making, in the future.

There is a lot of material left to make a wider blade for the spear. For those of you who read my little note about the misericorde, mayhap you have noticed a similarity in the shape of the spear and the dagger. Both are going to be used to jab into tough things, armor, either of a natural or man-made variety. I am not suggesting punching through a man’s plate armor, but rather, if it is worn, through gaps. Where these gaps lie, other padding may be present such as a gambeson, or other form of armored jacket. For those of you who have had to do with pigs, you will know that their hide serves them for a gambeson and their bristles for mail.

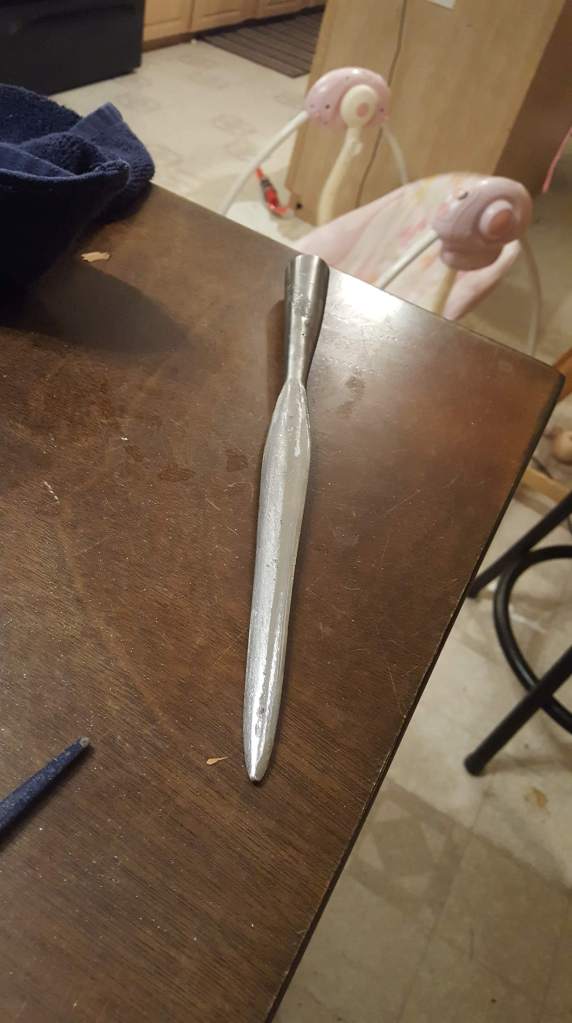
In the above, admittedly wobbly, photo, you may be able to make out the shape of the blade. It is thicker towards the front, and almost round there. There is a thinning and peening of the blade towards the middle, this is so they can take an edge. The spine is left fairly thick and stiff. The blade flares out a bit at the base to provide lots of supporting material for the socket. Below you might be able to see both shapes better, or at least get an idea. The overall form has characteristics of a spike for punching and edges for a bit of cutting as it enters. As I have said earlier I believe, having an edge makes retrieving fruit from the top of trees much easier.
I bet you are wondering when fire comes into this post. Once you scroll down we can get started looking at that.
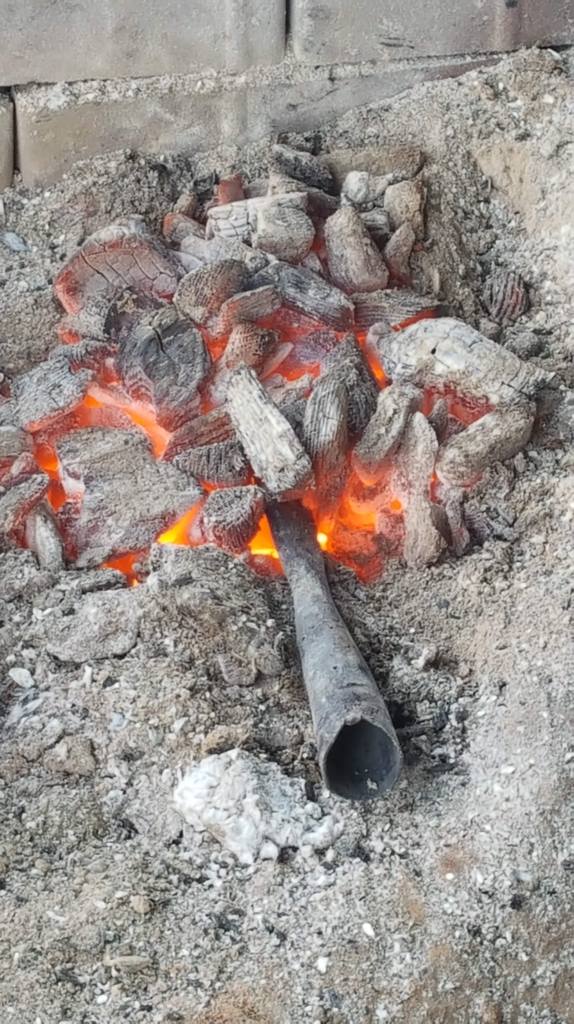
The fire in the picture is getting near end of the day, you can even see a clinker I drug out. I would also like to point out that the socket had been welded shut with a wire-feed welder before the final hardening was done. The pictures taken that day were all done by me with an old cellphone. I take full responsibility for their lack of quality. As well as their scarcity. I had both hands full of hammer and tongs most of the time.
The spearhead is sitting horizontal with the ground, about five to seven inches above the tuyere. There is a double fist sized lot of hot coals filling the area beneath and about the same amount above. That is the time to add the right amount of air until you achieve your heat. The picture below will show a window cut into this mound. Cut it out with your poker and you can see your work. If it is not done, do not worry! Just rake your hot coals back over it and maybe add a few more.
It should be noted, that though I say “coals”…
Most of the time I use charcoal. I have nothing against coal or coke; nor do I dislike propane forges. Charcoal is easier to obtain. Not to mention if we lack it in it’s ready made form, we simply make it. Sometimes it is made directly in the forge from wood.

Heat was concentrated into the top portion of the blade. After this the first inch of the tip of blade was immersed in damp sand and allowed to cool. With supervision of course.
After the forging is finished, the quenching complete and a bit of tempering gone by; well, you get out your files and start filing.

And filing.

And a bit more filing.

After you have filed and filed away all of the rough spots, you belt sand it with various grits of paper. You can also do this with different grits of stone. I still have a file handy because you will be shaping and shaping until you get happy with it. For me that takes a while. Incidentally, I wire-wheeled the socket as it was smoother already. Small files took care of the weld seam. Except where all the little pockmarks are. Nothing will fix that other than being a better welder. Below I am going to show a couple pictures and points I missed in the aforesaid cloud dancing.


On the left you can see a picture of the seam. It makes a neat little spiral. The blade and socket are properly aligned in spite of the spiral seam. Although the socket usually turns fairly straight if you pay attention on the bickern, you may wind up with a crooked blade and socket alignment. While you cannot leave it that way and expect your weapon to hold up very long, there is no cause for alarm. You will have the opportunity to correct it later with more heat.
Another detail to note is the crack beginning in the socket. It is hard to see, but it is all the way through the metal. It could not be left and the spear be of use, so I decided to weld it shut. Before this I had not intended to weld it at all. I took the spearhead to my father’s shop where my welder is located and while welding the crack, I went ahead and welded the seam also. Sometimes these cracks are unavoidable due to the nature of the metal. I suspect that too much cold working was the culprit however. I noticed it as I was rolling the socket. Frequent annealing would have helped. After the problem was noticed I annealed it thoroughly. Following that I heated the socket every so often. Maybe it is just me, but I notice that when I let the work rest over the heat, it works better. Or maybe it is just me that needs the rest.
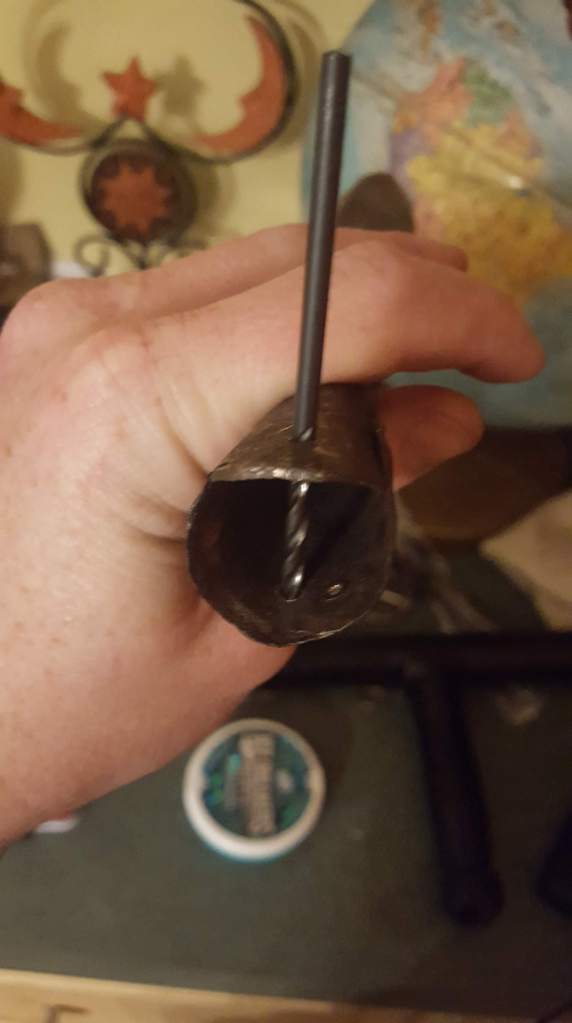
If you do not own a powered drill or a drill press, you will find it no obstacle. Center punch your hole on the bickern. Pay close attention to the spacing and angle. Using a bit in a vise-grip and a block for pressure, turn down until she bites. Follow through and you will have clean holes as you will need for your rivet.
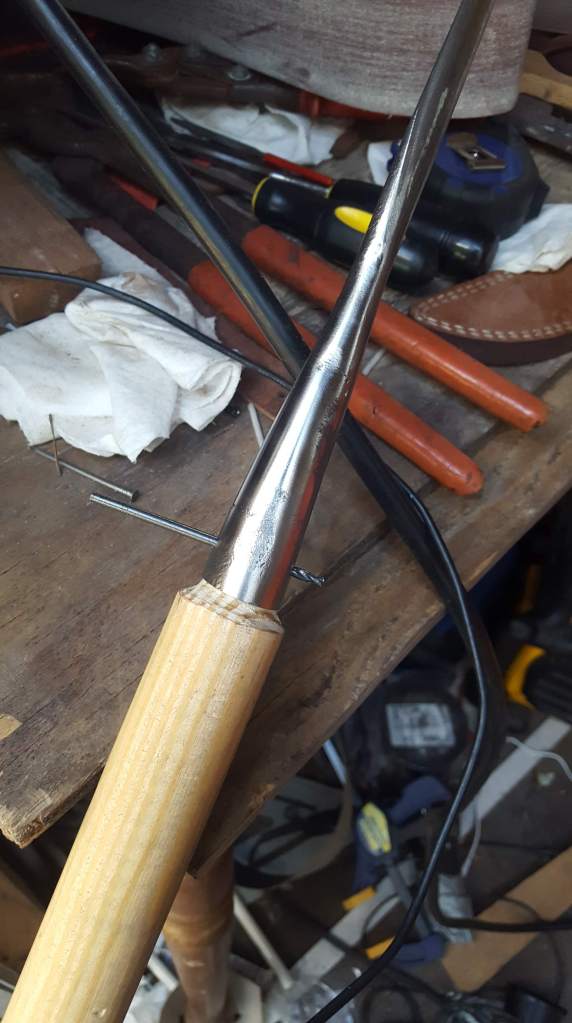
Polish your spearhead, it is done! Turn down your haft to fit inside, I paid no attention to the waste wood at this moment. Using the socket for a guide, I drilled a hole and mounted the head with an 8d nail cut down for a rivet. Take a trim or block plane, or a draw-knife and taper away from the socket. I chamfered the butt and carved a little divot for handing where I like it.

I have put it through some plywood, into the earth, bottles, among other targets. So far it has not given any indication it would like to bend. I was pleased. It is among my own personal panoply. It has served me at the time of this publication for over a year. I hope you enjoyed reading about the crafting of it as much as I enjoyed making it and telling you about it!
Warm regards,
Wulf

Amazing post!
LikeLike